![Building an ETL Pipeline in Python [Step by Step Guide]](https://www.linuxnasa.com/wp-content/uploads/2023/12/etl-python.jpg)
In this tutorial, we will learn about building an ETL pipeline in Python using step by step guide. ETL (Extract Transform Load) is a crucial process in data engineering that allows the data engineers to collect, transform and load data from various sources into a unified destination. We will walk through the essential skills, tools and methodologies required to construct a robust ETL pipeline using Python. From identifying the data sources, understanding the extraction process to transforming and loading data into a target system, each phase is defined and explained well in this tutorial. We will use Windows operating system to learn and build the ETL pipeline. So let us get started.
What is ETL?
ETL stands for Extract, Transform and Load. It is a process commonly used in data integration and data warehousing. In Python, ETL refers to the methodology and tools employed to collect data from various sources, transform it into a suitable format and load it into a target database or data warehouse.
There are different phases involved in the ETL pipeline development. Let us look at each phase briefly.
Phase -1: Extract
In the extraction phase, data is gathered from diverse sources such as, databases, APIs, files or web scraping. Python offers libraries like Pandas, BeautifulSoup and various database connectors to facilitate this extraction.
Phase-2: Transform
In this phase, once data is extracted, the data often needs to be cleaned, enriched or transformed to fit the target schema or to meet specific business requirements. Python’s Pandas library is powerful for data manipulation and transformation which makes it a popular choice for this phase.
Phase-3: Load
In this phase, the transformed data is loaded into the destination which could be a relational database, a data warehouse or another storage system. Python provides tools like SQlAlchemy or direct database connectors for this purpose.
How to Implement ETL Process Using Python [Step by Step Guide]
Also Read: How to use Python Requests Module Like a Pro
So far we understood about the ETL process and different phases involved in the process. In this section, we will actually implement all the ETL phases using Python and other supporting tools. Please follow the below given steps in sequential manner to achieve the goal. Before starting to build the ETL pipeline, make sure below prerequisites are met.
Prerequisite
- Windows Operating System Installed.
- VS Code IDE Installed.
- DB Browser Installed.
Step-1: Create Workspace
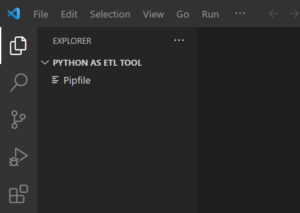
In this step, let us create a new project (new folder) in the local system. I have created the folder named “Python as ETL Tool”. We will create all the required files in this folder to develop the ETL pipeline.
NOTE:
Step-2: Create Virtual Environment
In this step, create the virtual environment for the newly created project. This step is required as we have to install certain Python packages and we want them to be installed at namespace level so that the packages are not installed at global level in the system. To do so, execute pipenv shell command as shown below.
PS D:\python_projects\Python as ETL Tool> pipenv shell
Creating a virtualenv for this project...
.......................................................
.......................................................
.......................................................
Successfully created virtual environment!
Virtualenv location: C:\Users\linuxnasa\.virtualenvs\Python_ETL_Tool-nDH7oCIP
Creating a Pipfile for this project...
Launching subshell in virtual environment...
Windows PowerShell
Copyright (C) Microsoft Corporation. All rights reserved.

Install the latest PowerShell for new features and improvements! https://aka.ms/PSWindows
After virtual environment is created, a Pipfile will also get generated in the current working directory as shown below.
Step-3: Create New File in the current directory
In this step, let us create a new file called fetchData.py. For this tutorial, I will fetch the data from coincap API. We will write and add the logic to fetch, transform and store the API data in the next step.
PS D:\python_projects\Python as ETL Tool> notepad fetchData.py
Step-4: Create SqlLite DB File in the current directory
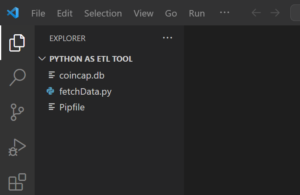
In this step, we will create a .db file called “coincap.db” where we will store the fetched data from the coincap API.
PS D:\python_projects\Python as ETL Tool> notepad coincap.db
After executing above command, you will see the file listed in the current project as shown below.
Step-5: Install Python Modules
In this step, install few Python modules such as requests, pandas and sqlalchemy which will be required in the next steps. to do this use pipenv install <module-name> command as shown below.
pipenv install requests
pipenv install pandas
pipenv install sqlalchemy
To verify if modules are installed successfully, open the Pipfile in the current project and look for all the installed modules. If you find them inside this file, it means modules are installed successfully.

Step-6: Write code to Fetch Data and Store in Sqlite DB
In this step, write the code to fetch the data from the coincap API and store it in coincap.db file as shown below.
import requests
import pandas as pd
import sqlalchemy as sa

url = "https://api.coincap.io/v2/assets"

header = {"Content-Type":"application/json", "Accept-Encoding":"deflate"}
db_file_path = "coincap.db"
response = requests.get(url, headers=header)

if response.status_code:

    #Convert response data into dataframe
    responseData = response.json()
    df = pd.json_normalize(responseData, 'data')

    #Build database connection
    conn_engine = sa.create_engine(f"sqlite:///{db_file_path}", echo=True)

    #Check if the table exists
    tableExist = sa.inspect(conn_engine).has_table('CryptoCoin')

    if tableExist:
        duplicateData = pd.read_sql_table('CryptoCoin', conn_engine)

        if not duplicateData.equals(df):
            df.to_sql(name='CryptoCoin', con=conn_engine, index=False, if_exists='replace')
            print('Data inserted into the Table')

        else:
            print("Data already exist into the table. No insert operation performed")
    else:
        df.to_sql(name='CryptoCoin', con=conn_engine, index=False, if_exists='fail')
        print("New Table CryptoCoin is created and data is inserted into the table")
else:
    print(f"Failed to fetch the data from the API. Status code: {response.status_code}")
OUTPUT
PS D:\python_projects\Python as ETL Tool> python .\fetchData.py
2023-12-03 12:06:24,075 INFO sqlalchemy.engine.Engine BEGIN (implicit)
2023-12-03 12:06:24,075 INFO sqlalchemy.engine.Engine PRAGMA main.table_info("CryptoCoin")
....................................................................................................................................................................

....................................................................................................................................................................
2023-12-03 12:06:24,091 INFO sqlalchemy.engine.Engine [raw sql] ()
2023-12-03 12:06:24,091 INFO sqlalchemy.engine.Engine
CREATE TABLE "CryptoCoin" (
id TEXT,
rank TEXT,
symbol TEXT,
name TEXT,
supply TEXT,
"maxSupply" TEXT,
"marketCapUsd" TEXT,
"volumeUsd24Hr" TEXT,
"priceUsd" TEXT,
"changePercent24Hr" TEXT,
"vwap24Hr" TEXT,
explorer TEXT
)
2023-12-03 12:06:24,091 INFO sqlalchemy.engine.Engine [no key 0.00163s] ()
2023-12-03 12:06:24,091 INFO sqlalchemy.engine.Engine INSERT INTO "CryptoCoin" (id, rank, symbol, name, supply, "maxSupply", "marketCapUsd", "volumeUsd24Hr", "priceUsd", "changePercent24Hr", "vwap24Hr", explorer) VALUES (?, ?, ?, ?, ?, ?, ?, ?, ?, ?, ?, ?)
2023-12-03 12:06:24,091 INFO sqlalchemy.engine.Engine [generated in 0.00099s] [('bitcoin', '1', 'BTC', 'Bitcoin', '19559412.0000000000000000', '21000000.0000000000000000', '771101076573.5458255777479780', '4816498677.1524700709815475', '39423.5305526334751565', '1.6291916635870664', '39229.4228820454190284', 'https://blockchain.info/'), ('ethereum', '2', 'ETH', 'Ethereum', '120234245.2688139400000000', None, '259530755846.3523150732230522', '3615898100.9654248426987910', '2158.5427285388280149', '2.7165786696992681', '2142.2169556104642879', 'https://etherscan.io/'),
......................................................................................................................................................................................................
......................................................................................................................................................................................................('nem', '100', 'XEM', 'NEM', '8999999999.0000000000000000', '8999999999.0000000000000000', '328423650.9835588832199944', '2443317.9434973602767676', '0.0364915167800056', '-0.4858512385006689', '0.0367749763723713', 'http://nembex.nem.ninja/')]
2023-12-03 12:06:24,105 INFO sqlalchemy.engine.Engine SELECT name FROM sqlite_master WHERE type='table' AND name NOT LIKE 'sqlite~_%' ESCAPE '~' ORDER BY name
2023-12-03 12:06:24,105 INFO sqlalchemy.engine.Engine [raw sql] ()
2023-12-03 12:06:24,105 INFO sqlalchemy.engine.Engine COMMIT
New Table CryptoCoin is created and data is inserted into the table
Let us execute the application again and see what happens. Insertion will not happen as there is no new data to be added in the database. Hence it will return the message that says “Data already exist into the table. No insert operation performed”.
PS D:\python_projects\Python as ETL Tool> python .\fetchData.py
Data already exist into the table. No insert operation performed
Step-7: Open DB File and Check the Data
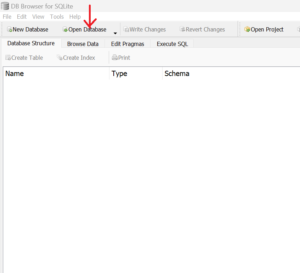
In this step , verify if the fetched data is successfully stored in the coincap.db database. To do so, first open DB Browser and click on Open Database button to add the coincap.db file as shown below.
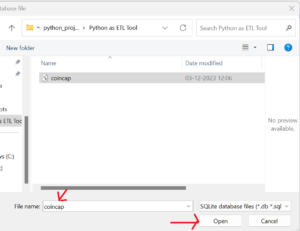
Next, browse to the folder where coincap.db file is placed and select the file to add the file in DB browser . Once selected, click on Open button to open the file as shown below.
Next, Click on the Table to verify if the CryptoCoin table is created as shown below.

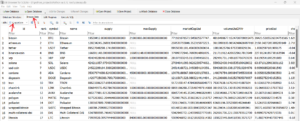
Next, Click on Browse Data option and select the table CryptoCoin from the drop down. You will see all the records added in the table as shown below.
Summary
We have successfully demonstrated the simple ETL process in Python. This article gives you the high level view of how the ETL works and it’s purpose. In real time use cases, ETL process can be complex and involve multiple tools to achieve the tasks. For example, there are different ETL frameworks available such as Apache Airflow, Bonobo, PySpark and so on that offers additional features and scalability for complex ETL workflows.