

In this tutorial, we will learn about “How to Automatically Refresh Web Pages Using Golang”. If you come from a web application development background, you must be aware that how live reloading feature enhances the development experience by automatically updating the web pages as code changes are made. For those who are new to this concept, let me give ou a overview of what this tutorial is really about.
Let us assume you are developing a web page which returns Hello World in response whenever anyone open your web page. During the web page development, you will do the changes many times till your code becomes robust. During the whole development cycle, every time you make some changes to your web page, you have to refresh the browser to see the latest changes you have made (if you are using local browsers to test the web pages). This tutorial will guide you on how to automate the page reload process without hitting the refresh button in the browser. So let us get started with the tutorial.
How to Automatically Refresh Web Pages Using Golang
Also Read: How to Validate Password Pattern in Golang [Step by Step Guide]
So far we understood about auto reload feature which is quite helpful for every web developer. Now the next question is how to achieve this feature?. There are many different ways to achieve this. The solution which we will talk about and implement is in Golang. There is an open source Golang utility available which is called “gin” (do not misunderstood this with gin web framework. both are separate thing).
The gin is a command line utility which is developed to live-reload Go web applications. This is easy going utility and just using few steps, you can easily integrate with your application. We will learn about using this utility with our web applications in the next section.
Prerequisite
- Windows Operating System Installed
- VS Code IDE Installed
- Any browser Installed (Chrome is used in this tutorial)
- Basic Understanding of Windows cmd Commands
Step-1: Create New Project
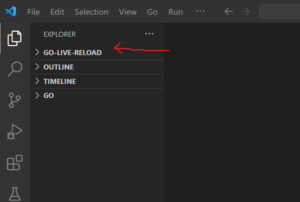
In this step, we will create a new Golang project. To do so, create a new folder in your local system and open the folder in VS Code as shown below. I have named the project as “go-live-reload”.
Step-2: Create go.mod File
In this step, create a new go.mod file at the project level. To do so, use the go mod init <modul-name> command as shown below. You can give any module name in the below command.
PS D:\go-project\go-live-reload> go mod init github.com/linux-nasa/go-live-reload
go: creating new go.mod: module github.com/linux-nasa/go-live-reload
After creating the go.mod file, the content of it will look like below. Initially this file will only contain the installed go version.
module github.com/linux-nasa/go-live-reload
go 1.21.0
Step-3: Install gin Module
In this step, install the gin module which is open source Golang utility available at github.com using below command. Please note that the gin utility which we are installing is different from the gin web framework.
PS D:\go-project\go-live-reload> go install github.com/codegangsta/gin@latest
go: downloading github.com/codegangsta/gin v0.0.0-20230218063734-2c98d96c9244
go: finding module for package github.com/urfave/cli

..........................................................................................................

............................................................................................................
go: found github.com/urfave/cli in github.com/urfave/cli v1.22.14
go: downloading github.com/cpuguy83/go-md2man/v2 v2.0.2
NOTE:
Step-4: Verify the gin Utility Installation
In this step, after installing the gin module, verify the installation by executing below command. If you get the gin help page in the command output, it means the utility has been installed successfully.
PS D:\go-project\go-live-reload> gin --help
NAME:
gin - A live reload utility for Go web applications.

USAGE:
gin.exe [global options] command [command options] [arguments...]

COMMANDS:
run, r Run the gin proxy in the current working directory
env, e Display environment variables set by the .env file
help, h Shows a list of commands or help for one command

GLOBAL OPTIONS:
--laddr value, -l value listening address for the proxy server [%GIN_LADDR%]
--port value, -p value port for the proxy server (default: 3000) [%GIN_PORT%]
.............................................................................
.............................................................................
--keyFile value TLS Certificate Key [%GIN_KEY_FILE%]
--logPrefix value Log prefix (default: "gin") [%GIN_LOG_PREFIX%]
--notifications Enables desktop notifications [%GIN_NOTIFICATIONS%]
--help, -h show help
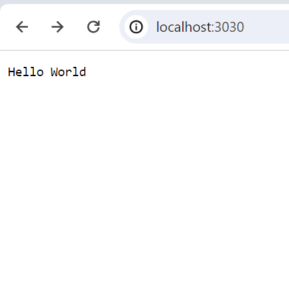
We are now all set to integrate and use the gin module with our web application. Next step is to create a simple web applictaion in Golang which will print the message Hello World to the end user. Please follow the below steps in sequential manner to create a simple Golang web application.
Step-5: Create Golang Web Application
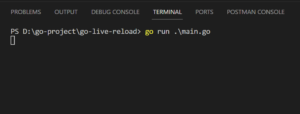
In this step create a new file in the current project called “main.go” and add below code to it. This code will create a simple Web server which will serve the response to the end user whenever the endpoint “/” at the localhost is hit by the end user.
package main

import (
    "fmt"
    "net/http"
)

func handleFunc(w http.ResponseWriter, r *http.Request) {
    fmt.Fprintf(w, "Hello World")
}

func main() {

    http.HandleFunc("/", handleFunc)
    http.ListenAndServe(":3030", nil)
}
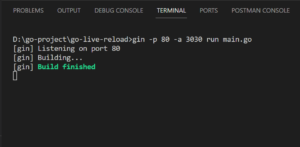
Step-6: Integrate gin Module with Web Application
PS D:\go-project\go-live-reload> gin -p 80 -a 3030 run main.go
[gin] Listening on port 80
[gin] Building...
[gin] Build finished
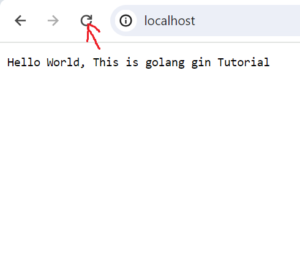
func handleFunc(w http.ResponseWriter, r *http.Request) {
    fmt.Fprintf(w, "Hello World, This is golang gin Tutorial")
}
NOTE:
package main

import (
    "html/template"
    "net/http"
)

func handleFunc(w http.ResponseWriter, r *http.Request) {

    var file = "message.html"
    t, _ := template.ParseFiles(file)
    t.ExecuteTemplate(w, file, nil)
}

func main() {

    http.HandleFunc("/", handleFunc)
    http.ListenAndServe(":3030", nil)
}
<html>
    <!--add the meta element which will refresh the page every 1 sec. refresh time is configurable using the field content in the meta element below -->
    <meta http-equiv="refresh" content="1" />
    <h1>
        Hello World!!
    </h1>
</html>
<html>
...........................
............................
        Hello World!!, Please subscribe if you like my tutorials.
.......................
</html>