
In this article, we will learn about how to enable Hyper-V and WSL in Windows machine. In Windows, Hyper-V empowers the users with robust virtualization capabilities, allowing the creation and management of virtual machines. WSL on the other hand facilitates a seamless integration of Linux environments within the Windows operating system. We will learn about how to enable both the feature in Windows machine and utilize its capability of use supported virtual machines. So let us begin the tutorial.
Prerequisite
- Admin privilege required.
- Basic understanding of Windows operating system.
How to Enable Hyper-V and WSL in Windows Machine
Also Read: How to Install Keycloak-23.0.0 on Windows [9 Easy Steps]
To enable Hyper-V and WSL features in the Windows machine, follow below steps in sequential order. I suggest to check and fulfill the prerequisite before jumping on the the below steps.
Step-1: Turn on Windows Features
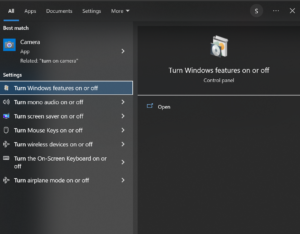
In this step, search for the term “turn windows features on or off” in the Windows search bar and open it as admin as shown below.
Step-2: Enable Hyper-V and WSL
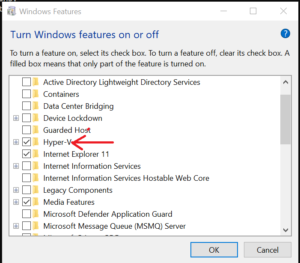
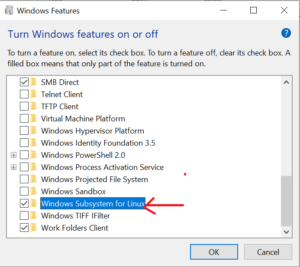
In this step, a pop up will appear. Tick mark the Hyper-V and Windows Subsystem for Linux option as shown below and then click on Ok button.
Step-3: Restart the System
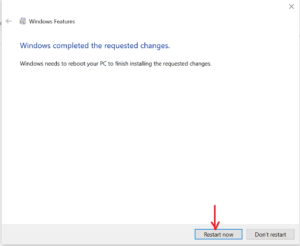
In this step, after tick marking the boxes in previous step, a pop up will appear which will ask you to restart the system. Click on the Restart Now button to restart the system as shown below.
Step-4: Install WSL
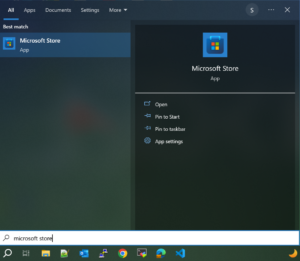
In this step, once the system restart is done, search for the keyword “Microsoft store” and click on it to open as shown below.
Next, in the search bar, type “linux” and press the Enter key as shown below.

Next, in this step, click on Windows Subsystem for Linux option and install it as shown below.

Step-5: Verify WSL
In this step, after installing WSL from the microsoft store, open Windows Command Prompt (cmd) and type the command wsl -v. This command will show the installed version of WSL. If you get the similar output as shown below, it means WSL is installed properly.
C:\Users\linuxnasa.com>wsl -v
WSL version: 2.0.9.0
Kernel version: 5.15.133.1-1
WSLg version: 1.0.59
MSRDC version: 1.2.4677
Direct3D version: 1.611.1-81528511
DXCore version: 10.0.25131.1002-220531-1700.rs-onecore-base2-hyp
Windows version: 10.0.19044.3693
Summary
We have successfully enabled the WSL in Windows system. We also verified the installed version of WSL. You can now install any available Linux distribution in the WSL based on your requirment.