In this tutorial, we will learn about how to install EBS CSI driver using 10 easy steps. There are two CSI drivers supported in AWS which are used to allocate persistent volume in EKS. They are EBS (Elastic Block Storage) and EFS (Elastic File Storage). Both CSI driver requires a policy attached to it which will allow the driver’s service account to make call to AWS APIs.
What is EBS CSI Driver?
Elastic Block Storage (EBS) Container Storage Interface (CSI) driver provides a CSI interface to the EKS to manage the lifecycle of Amazon EBS volumes. EBS CSI driver supports both static as well as dynamic provisioning of volumes. Static provisioning will associate an externally created EBS volume with a PV in your cluster. This volume is then consumed by workloads within the cluster. Whereas dynamic provisioning will automatically creates EBS volumes and associates PV from PVC. EBS CSI driver also allows an option to expand the volume using PVC in which we can define a new size for the volume. You can read more about EBS CSI Driver here.
How to Install EBS CSI Driver Using 10 Easy Steps
There are two ways to add the EBS CSI Driver in your cluster. These are
- As Amazon EKS add-on
- As Self managed add-on
In this tutorial, we will learn about how to add EBS CSI driver as add-on in the EKS cluster. Before you start following the steps, please confirm that prerequisites are satisfied.
Prerequisites
- An existing EKS Cluster
- An OIDC Identity provider for your cluster
Create IAM Role
We first have to create a new role to which we will attach a policy so that EBS CSI driver’s service account can make calls to AWS APIs. Follow Below steps to create a new role.
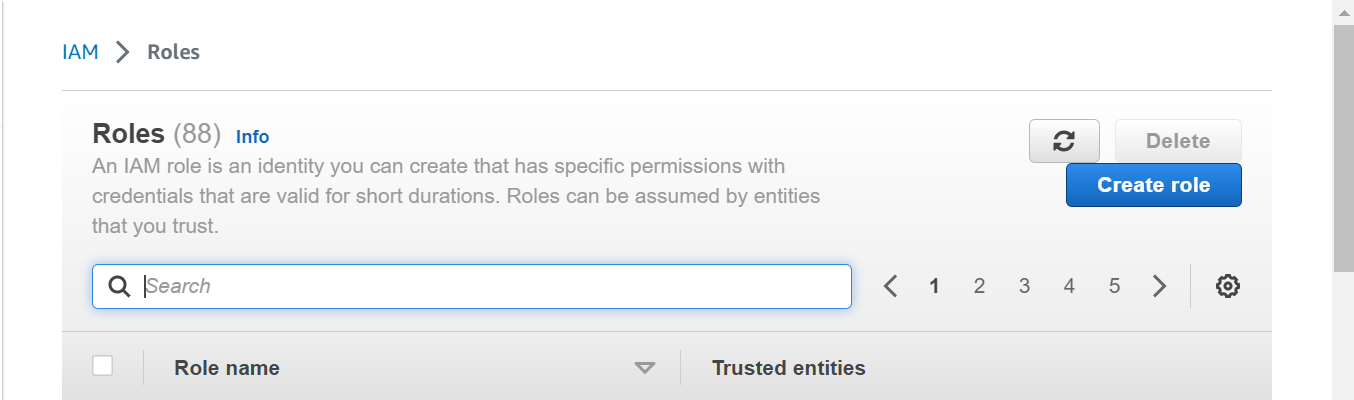
Step-1: Search IAM Service
In this step, go to IAM service. Click on Roles and then click on Create role.
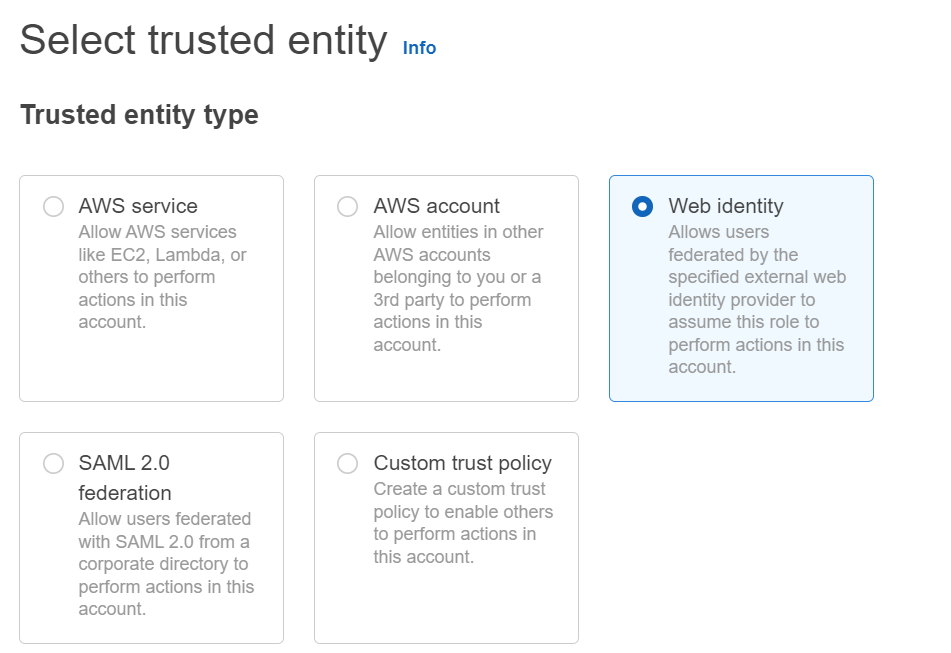
Step-2: Select Entity Type
In this step, Select Web identity as Trusted Entity type.
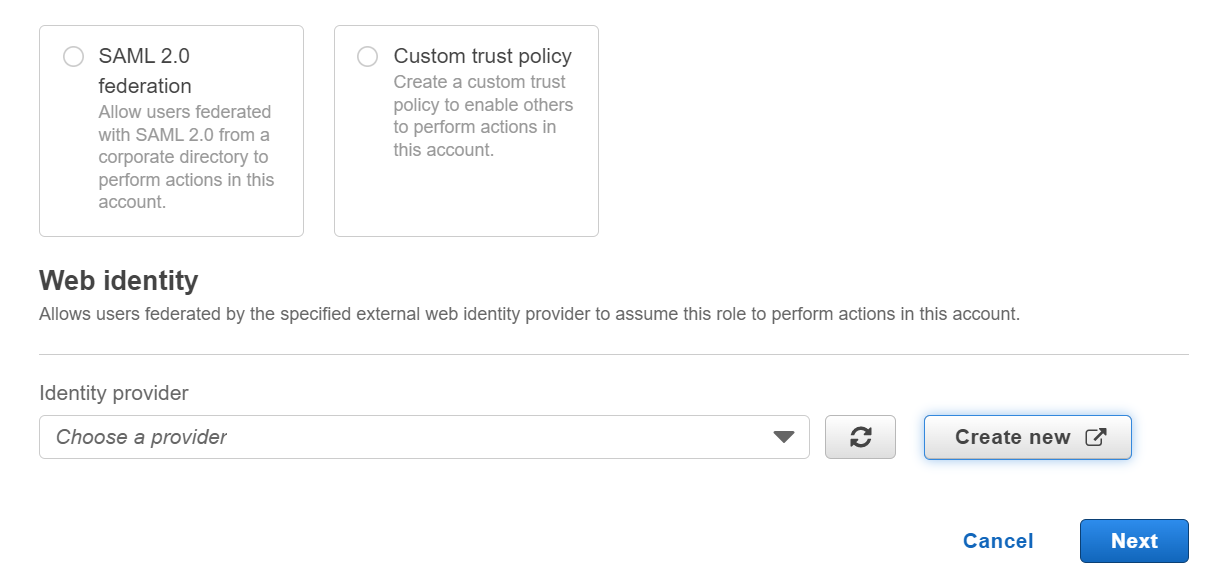
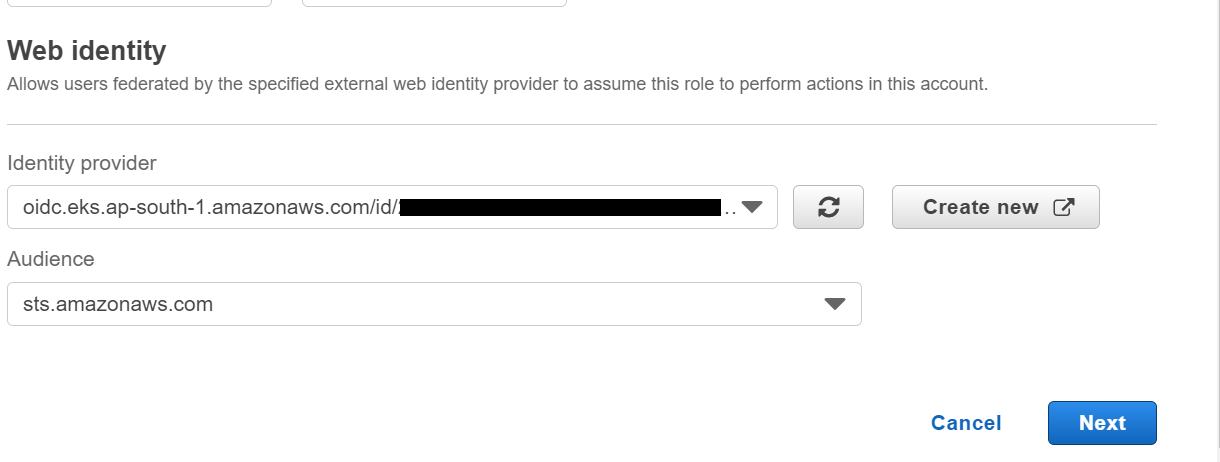
Step-3: Select IdP
In this step, select your cluster’s identity provider. You can add your cluster IdP if you have not already added.
Step-4: Select Audience
In this step, add the audience as sts.amazonaws.com. Click on Next.
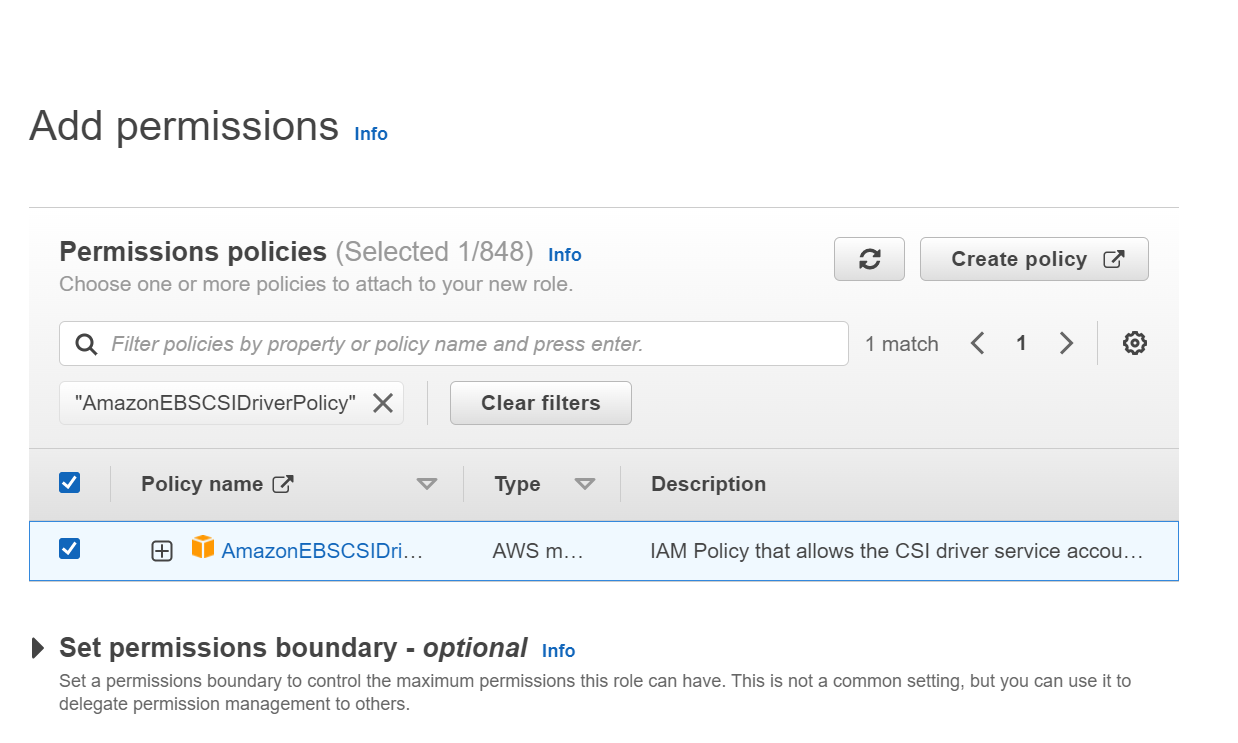
Step-5: Attach policy
In this step, add permissions to the role by attaching the policy. Select AmazonEBSCSIDriverPolicy and click on the check box to attach the policy.
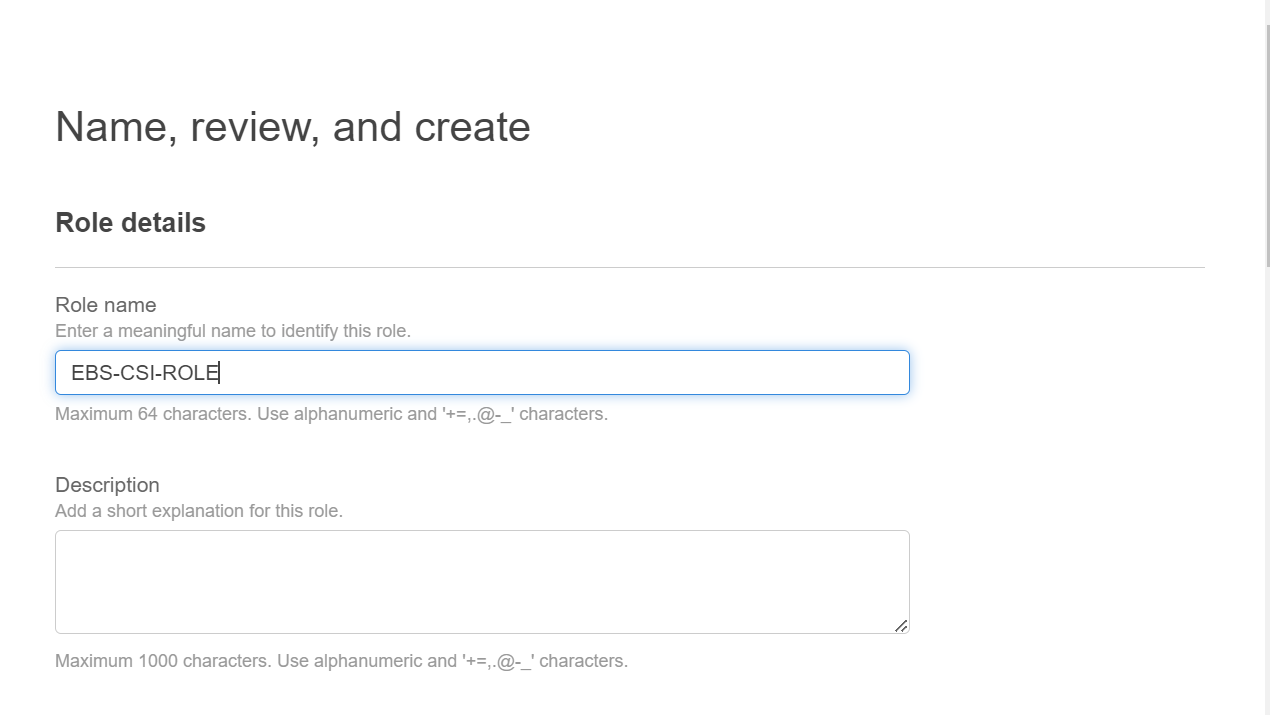
Step-6: Create role
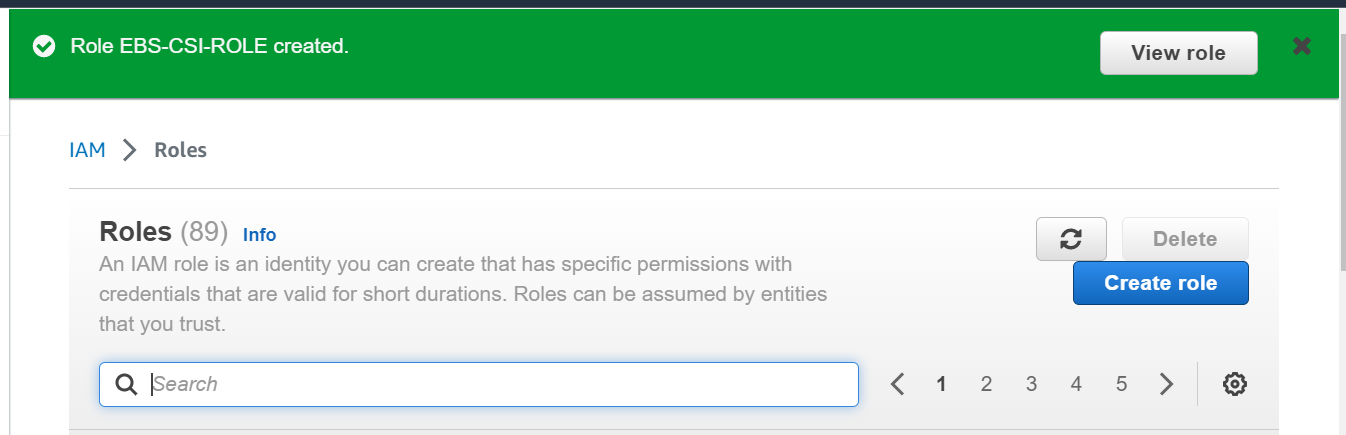
In this step, assign a name to your role and review all the configuration done in previous steps. I have given the Role name as EBS-CSI-ROLE. Next click on Create role.
Next, Once the role is created successfully, click on View role.
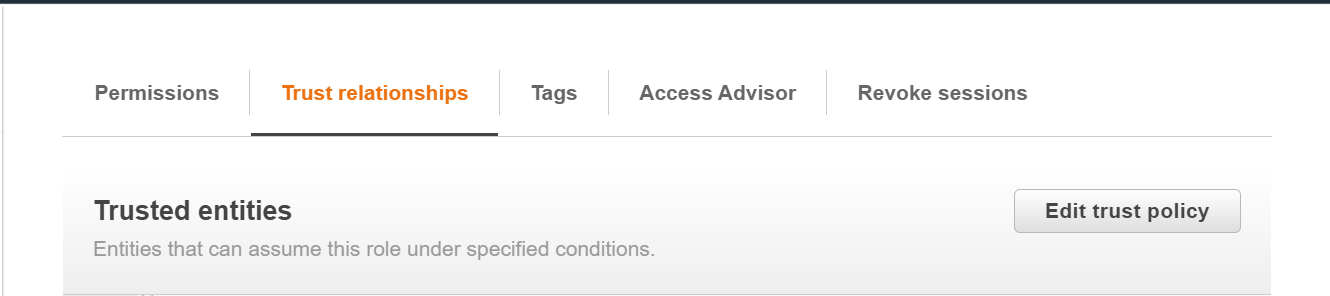
Step-7: Edit Trust Policy
In this step, click on Trust relationships to edit the policy. We will edit the policy to add the EBS CSI driver’s service account.

Next, click on Edit trust policy.
Step-8: Add OIDC provider URL
In this step, add below line and replace <region-code> with the region where your cluster is created and <cluster-OIDC-provide-id> with your cluster’s OIDC IdP id. As highlighted below, find a line which look similar and add a comma before adding the new line after the previous line.
“oidc.eks.<region-code>.amazonaws.com/id/<cluster-OIDC-provide-id>:sub”: “system:serviceaccount:kube-system:ebs-csi-controller-sa”
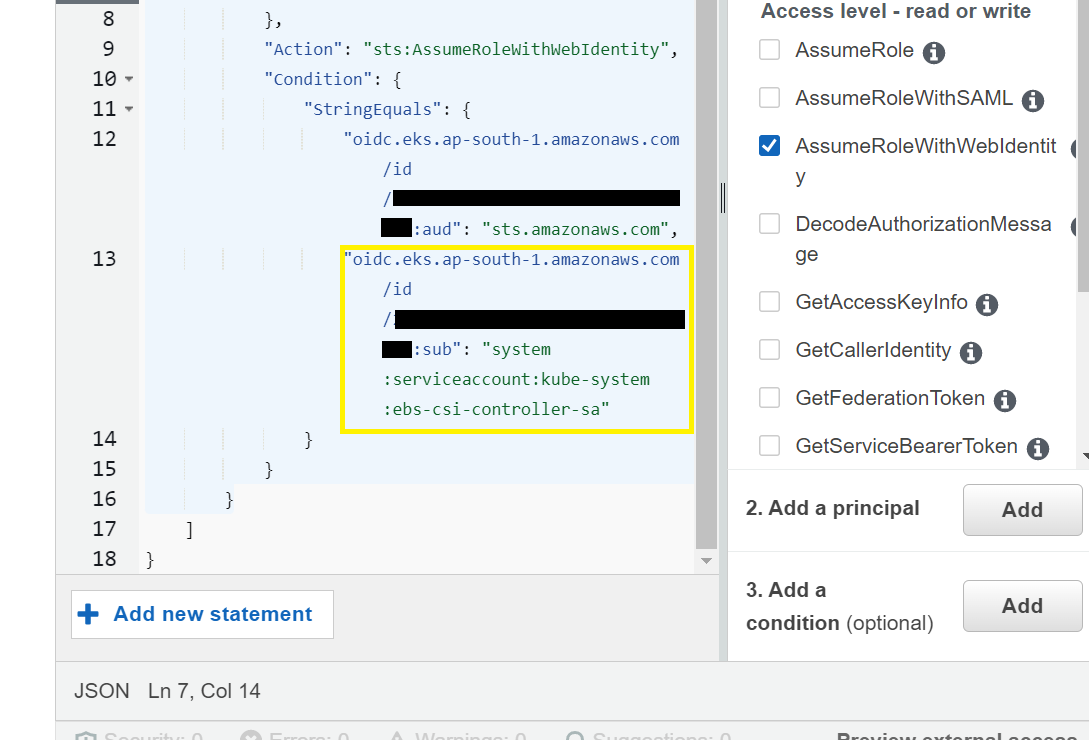
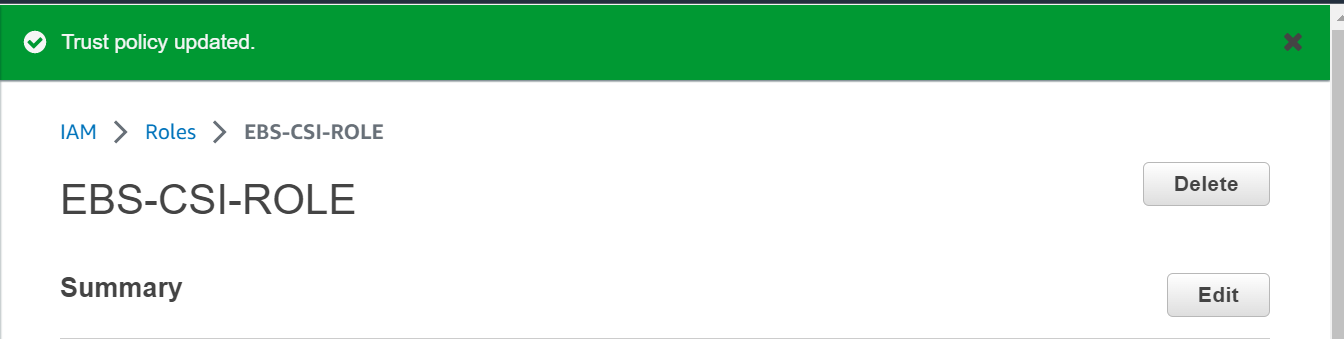
Next, click on Update policy to apply the changes done in previous step. Policy will get updated.
NOTE:
To know your cluster’s OIDC IdP url, use below command.
[nasauser@linuxnasa~]$ aws eks describe-cluster --name <cluster-name> --query "cluster.identity.oidc.issuer" --output text
Add EBS CSI Driver
In next step, we will search and add the EBS CSI plugin in our cluster and attach the role which we have created above.
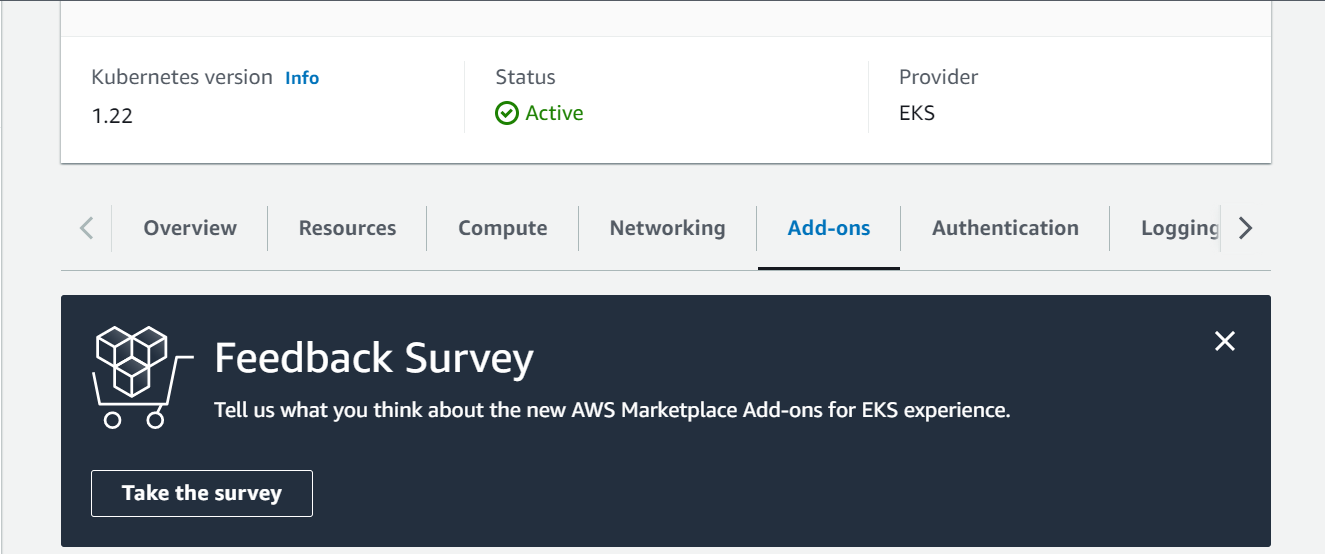
Step-9: Search EBS CSI Driver Add-on
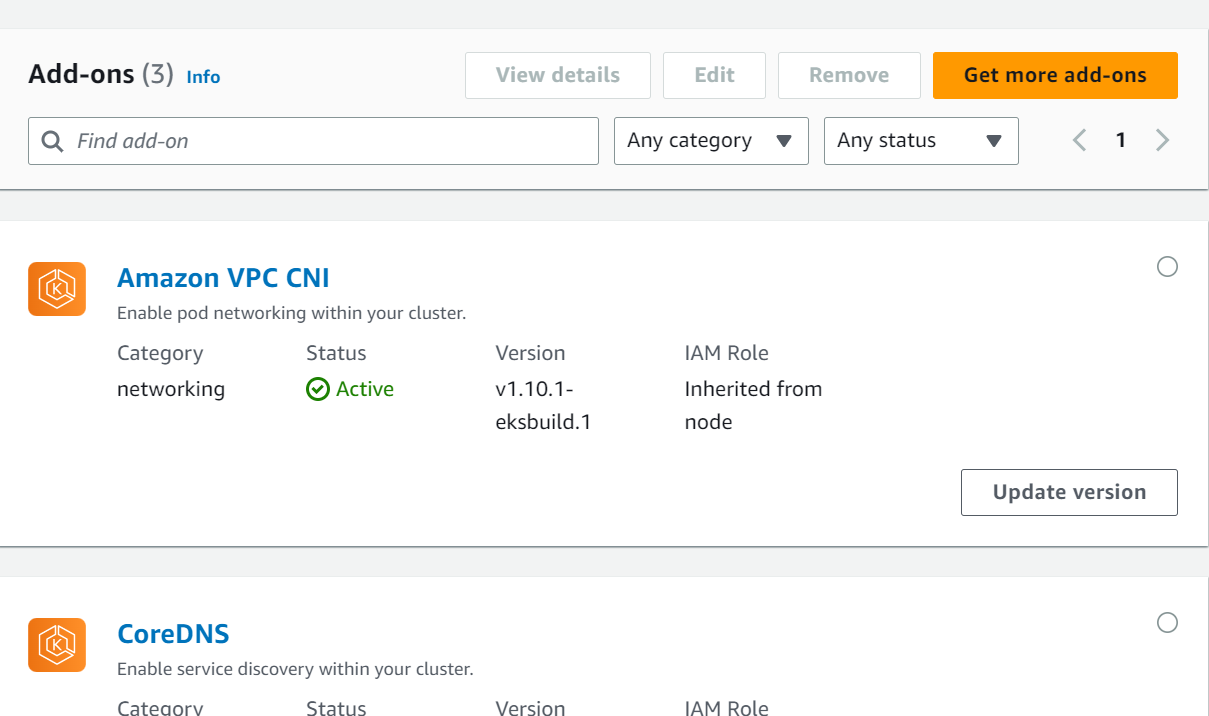
In this step, go to EKS service from console and click on your cluster. Next click on Add-ons.
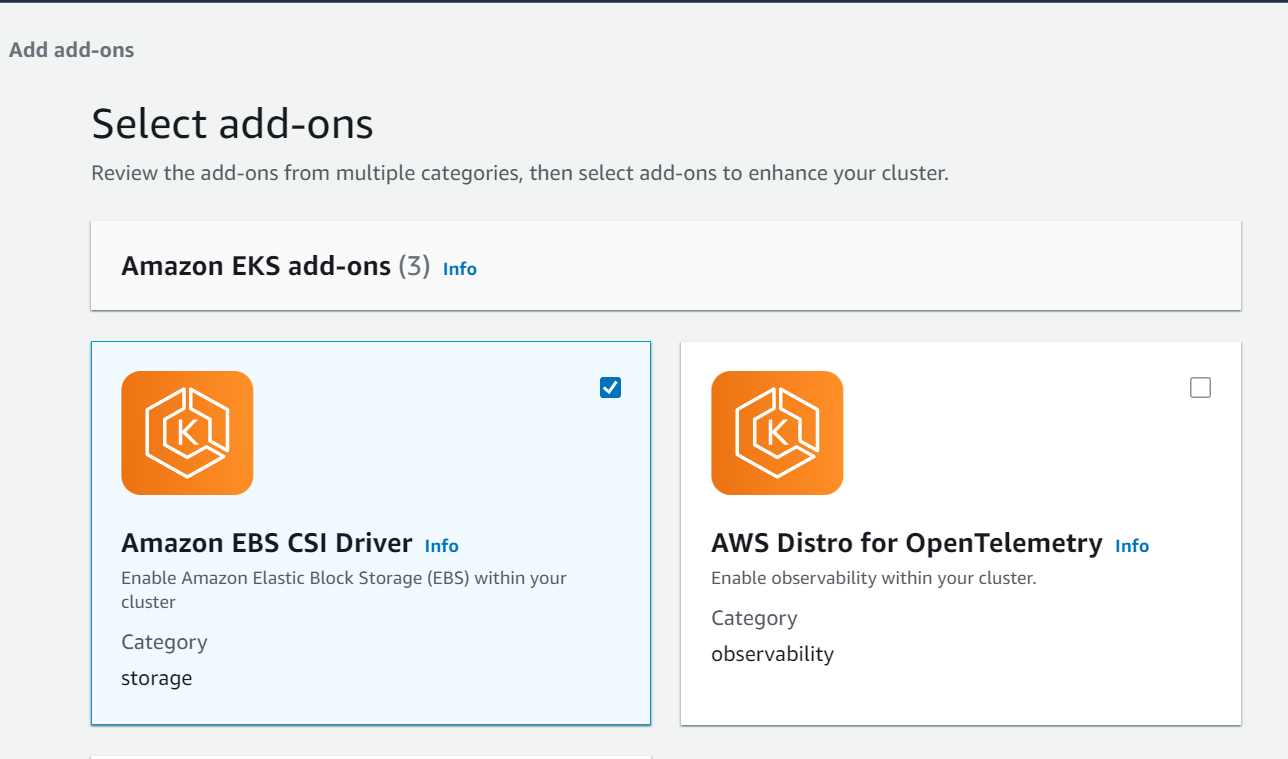
Next, click on Get more add-ons where you can search the EBS CSI driver to add.
Next, click on Amazon EBS CSI Driver check box to add this plugin in your cluster.
Step-10: Attach role and add driver
In this step, select the IAM role we have created in previous step from the drop down.
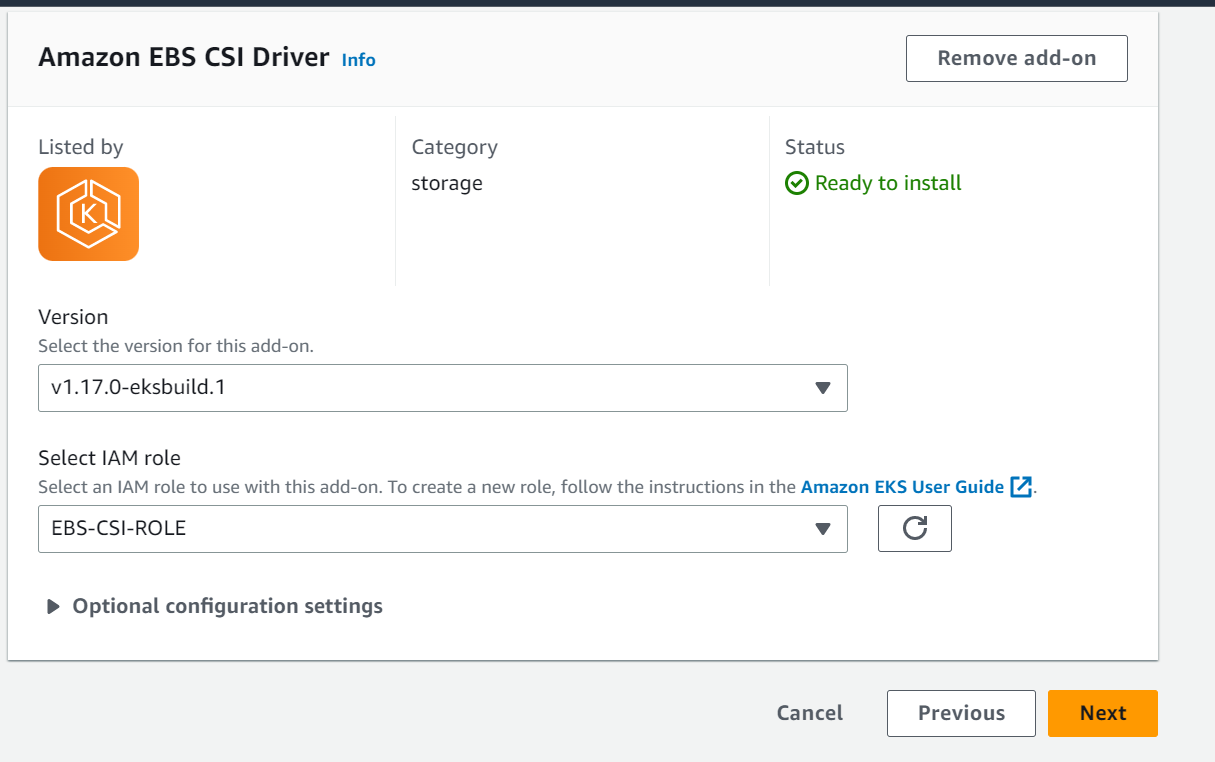
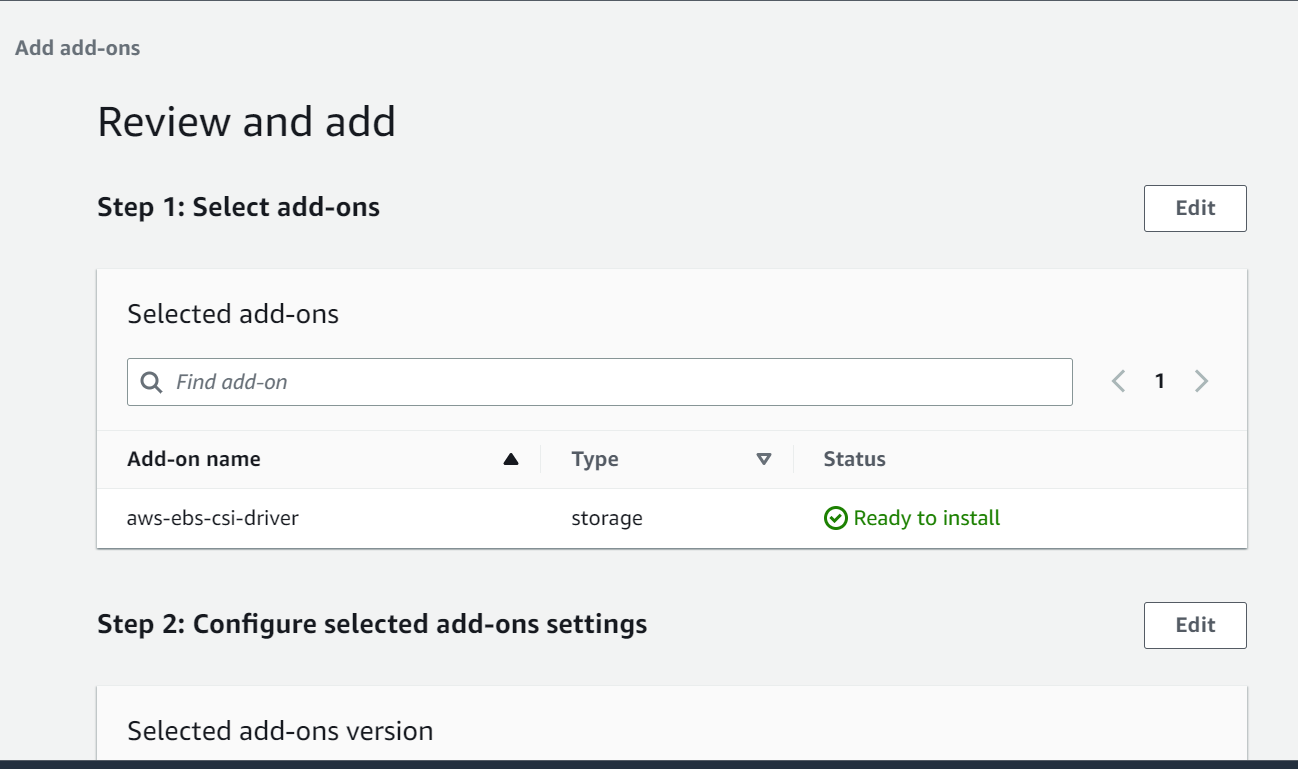
Next, review all the configuration and click on Add to add the EBS CSI driver as EKS add ons.
Lastly, when all done, annotate the ebs-csi-controller-sa kubernetes service account with the ARN of IAM role and restart the ebs-csi-controller deployment to take the annotation changes in effect using below commands.
Annotate the service account using below command. Replace <account-id> with your account id
[nasauser@linuxnasa~]$kubectl annotate serviceaccount ebs-csi-controller-sa -n kube-system eks.amazonaws.com/role-arn=arn:aws:iam::<account-id>:role/EBS-CSI-ROLE
Restart the deployment using below command
[nasauser@linuxnasa~]$ kubectl rollout restart deployment ebs-csi-controller -n kube-system
You can now see the ebs-csi-controller deployment and service account created on your cluster as shown below.
[nasauser@linuxnasa~]$ kubectl get sa -n kube-system | grep ebs
ebs-csi-controller-sa          1       48s
ebs-csi-node-sa                1       48s
[nasauser@linuxnasa~]$ kubectl get deployment -n kube-system
NAME                READY UP-TO-DATE AVAILABLE AGE
coredns             2/2   2           2     19h
ebs-csi-controller  2/2   2           2     5m14s
Conclusion
In this tutorial, we learnt about how to create IAM role for EBS CSI Driver and how to add the CSI driver as EKS add-on. After adding the CSI driver, we can now use the persistent volume in our cluster by creating the storage class and assigning the volumes to workloads. You can read about How to use persistent storage in EKS to understand the working of EBS CSI driver thoroughly.