Introduction
In this tutorial, we will learn about how to install Flask in VS Code and Build REST API using 9 Easy steps. REST API is basically an architectural style for designing networked applications i.e applications that uses some form of network to communicate. REST API development can be done using many programming languages like Java, Python, Go and so on.
Python provides many framework which can be used to do the REST API development like FastAPI, Django and Flask. Flask is a lightweight microframework. We will cover about how Flask is installed and a REST API is developed in upcoming sections. so let’s get started.
Flask Overview
Flask is a web framework which is lightweight and written in Python. With variety of modules that Flask provides, it becomes easy to develop web applications. It is WSGI (Web Server Gateway Interface) web app framework that comes with many features like url routing, template engine and many more. Flask is based on Werkzeg WSGI toolkit and the Jinja template engine.
![How to Install Flask in VS Code and Build REST API : [ 9 Easy Steps]](https://www.linuxnasa.com/wp-content/uploads/2023/09/RESTApi.jpg)
How to Install Flask in VS Code and Build REST API : [ 9 Easy Steps]
In the next section, we will first look at installing the Flask in VS Code and then we will use flask to create a simple hello world REST API for demonstration that will give you a feel of how APIs are build. Before start on next section, make sure prerequisites are met .
Also read: What is API and its Usage ? :[4 Types of APIs]
Prerequisite
- Windows Operating System Installed
- VS Code Installed
- Python Installed
Install Flask
Step-1: Create New Directory
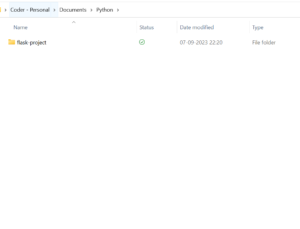
In this step, create a new directory ‘flask-project‘ (you can give any name to the directory, does not really matter) as shown below.
Step-2: Switch to new Directory in VS Code
In this step, open the VS Code and navigate to the directory you have created in step-1 as shown below.
PS C:\Users\linuxnasa\OneDrive> cd .\Documents\Python\flask-project\
Step-3: Create Virtual Environment
In this step, once you are inside ‘flask-project’ folder, create a virtual environment as shown below. Virtual environment creates a namespace in your host machine that segregate your work from rest of the space in your host machine.
PS C:\Users\linuxnasa\OneDrive\Documents\Python\flask-project> python -m venv venv
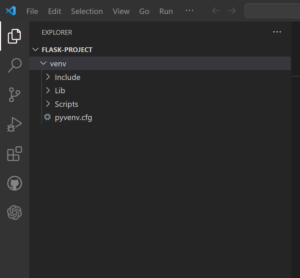
After creating the virtual environment, a new folder in your current directory ‘venv’ will get created which will have all the configuration of virtual environment for current directory as shown below.
Step-4: Activate Virtual Environment
In this step, activate the virtual environment in current directory using below command. If you see ‘venv’ in front of command promp, that means virtual environment is activated. now you can install the flask.
PS C:\Users\linuxnasa\OneDrive\Documents\Python\flask-project> .\venv\Scripts\activate
(venv) PS C:\Users\linuxnasa\OneDrive\Documents\Python\flask-project>
Step-5: Install Flask
In this step, after activating the virtual environment, install the Flask using below command.
(venv) PS C:\Users\linuxnasa\OneDrive\Documents\Python\flask-project> pip install flask
Collecting flask
Using cached flask-2.3.3-py3-none-any.whl (96 kB)
Collecting blinker>=1.6.2
Using cached blinker-1.6.2-py3-none-any.whl (13 kB)
Collecting itsdangerous>=2.1.2
Using cached itsdangerous-2.1.2-py3-none-any.whl (15 kB)
Collecting Jinja2>=3.1.2
Using cached Jinja2-3.1.2-py3-none-any.whl (133 kB)
Collecting click>=8.1.3
Using cached click-8.1.7-py3-none-any.whl (97 kB)
Collecting Werkzeug>=2.3.7
Using cached werkzeug-2.3.7-py3-none-any.whl (242 kB)
Collecting colorama
Using cached colorama-0.4.6-py2.py3-none-any.whl (25 kB)
Collecting MarkupSafe>=2.0
Using cached MarkupSafe-2.1.3-cp310-cp310-win_amd64.whl (17 kB)
Installing collected packages: MarkupSafe, itsdangerous, colorama, blinker, Werkzeug, Jinja2, click, flask
Successfully installed Jinja2-3.1.2 MarkupSafe-2.1.3 Werkzeug-2.3.7 blinker-1.6.2 click-8.1.7 colorama-0.4.6 flask-2.3.3 itsdangerous-2.1.2

[notice] A new release of pip is available: 23.0.1 -> 23.2.1
[notice] To update, run: python.exe -m pip install --upgrade pip
Develop REST API
Step-6: Create Hello World REST API
In this step, after successfully installing the flask, create a simple Hello World REST API. Create a new file ‘app.py‘ and add below code to this file. Save the file.
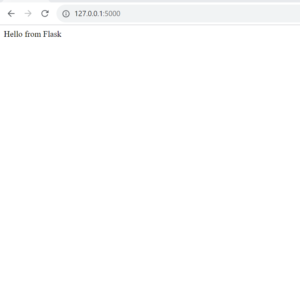
from flask import Flask

app = Flask(__name__)

@app.route('/')
def hello_flask():
    return "Hello from Flask"

@app.route('/api-dev')
def hello_api():
    return "Develop API using Flask"

if __name__ == '__main__':
    app.run()
In the above code, we are importing Flask from flask library. Then we are creating an object ‘app‘ of type Flask. We have used decorator(@) to define the route for our endpoint(/ and /api-dev). Here the decorators will decorate the function hello_flask and hello_api respectively and the functions will return the text define inside it to respective endpoints.
NOTE:
Step-7: Start Flask Web Server
(venv) PS C:\Users\linuxnasa\OneDrive\Documents\Python\flask-project> python .\app.py
* Serving Flask app 'app'
* Debug mode: off
WARNING: This is a development server. Do not use it in a production deployment. Use a production WSGI server instead.
* Running on http://127.0.0.1:5000
Press CTRL+C to quit
NOTE:
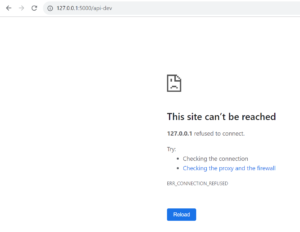
Step-8: Access REST API from Browser
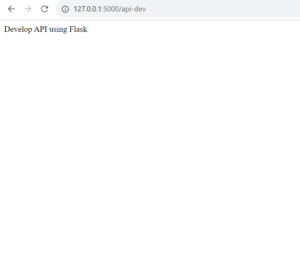
(venv) PS C:\Users\linuxnasa\OneDrive\Documents\Python\flask-project> python .\app.py
* Serving Flask app 'app'
* Debug mode: off
WARNING: This is a development server. Do not use it in a production deployment. Use a production WSGI server instead.
* Running on http://127.0.0.1:5000
Press CTRL+C to quit
127.0.0.1 - - [08/Sep/2023 00:05:34] "GET / HTTP/1.1" 200 -
127.0.0.1 - - [08/Sep/2023 00:06:01] "GET / HTTP/1.1" 200 -
127.0.0.1 - - [08/Sep/2023 00:07:15] "GET /api-dev HTTP/1.1" 200 -
Step-9: Stop the Web Server
Summary
We learnt about Flask, REST API and installation of flask. You are now good to go ahead with REST API development using Flask framework.