In this tutorial, we will learn about how to install Red hat OpenShift Local on Windows 10 using 6 easy steps. OpenShift is developed by Red hat and is a family of containerization software products. OpenShift Local is one of the distribution of OpenShift that allows us to create a cluster of one single node for local development. Please remember this distribution is not supported in production environment.
What is Red hat OpenShift ?
Red hat OpenShift is a container platform designed for developing, deploying and managing applications. It is an open-source container orchestration platform, based on Kubernetes. OpenShift provides a PaaS environment for building, deploying and scaling applications. It allows the developers to focus on writing code without bothering about the underlying infrastructure, as OpenShift handles deployment, scaling and management of containerized applications.
![How to Install Red hat OpenShift Local on Windows 10 [6 Easy Steps]](https://www.linuxnasa.com/wp-content/uploads/2023/08/openshift.jpg)
How to Install Red hat OpenShift Local on Windows 10 [6 Easy Steps]
Also read: Channel in Golang: [5 Best Examples]
Prerequisite
- System installed with Windows 10 Operating System
- System has 16GB RAM
- Virtualization enabled in the system
- Hyper-V installed in the system
- Disk space 40GB available in the system
- Existing free account with Red hat
Once you have all the prerequisite tick marked, you are good to go ahead with the Red hat OpenShift Local installation by following below steps in order.
Step-1: Download OpenShift Local Binary and Secret
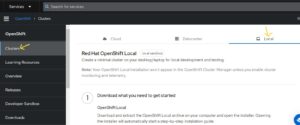
In this step, open and login to redhat.console.com. If you do not have an existing account, You can create one new account before proceeding. Next, Click on Clusters -> Create cluster -> Local as shown below.
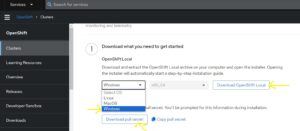
Next, Select Windows OS from the drop down and then Click on Download OpenShift Local to download the crc archive. Next, click on Download pull secret to download the secret.
Step-2: Install OpenShift Using Binary
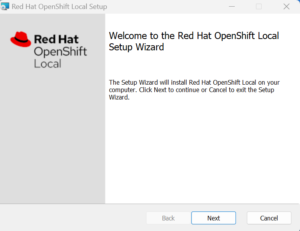
In this step once the crc archive is downloaded, extract it in a folder and start the installation using the executable binary as shown below. Click on Next.
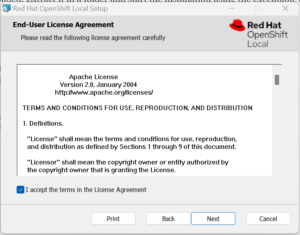
Next, tick mark the license and click on Next.
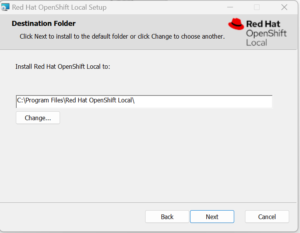
Leave the destination path default and click on Next.
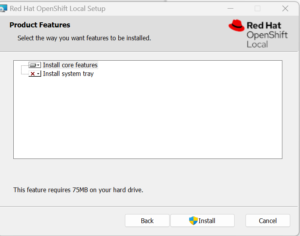
Next, click on Install to start the Installation.
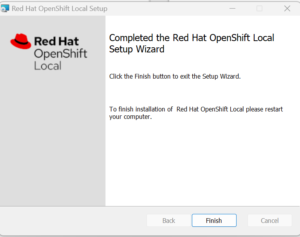
Next, click on Finish to finish the installation
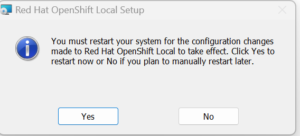
To finish the installation, you must restart your machine. a pop up will appear as shown below. Click on Yes.
Step-3: Configure Red hat OpenShift Local on Windows OS
In this step, after the restart of machine, open Window’s cmd and execute the command crc setup to start configuring crc. A pop up will appear, type Yes.
C:\Users\linuxnasa>crc setup
CRC is constantly improving and we would like to know more about usage (more details at https://developers.redhat.com/article/tool-data-collection)
Your preference can be changed manually if desired using 'crc config set consent-telemetry <yes/no>'
Would you like to contribute anonymous usage statistics? [y/N]: yes
No worry, you can still enable telemetry manually with the command 'crc config set consent-telemetry yes'.
INFO Using bundle path C:\Users\linuxnasa\.crc\cache\crc_hyperv_4.13.6_amd64.crcbundle
INFO Checking minimum RAM requirements
INFO Checking if current user is in crc-users and Hyper-V admins group
INFO Checking if CRC bundle is extracted in '$HOME/.crc'
INFO Checking if C:\Users\linuxnasa\.crc\cache\crc_hyperv_4.13.6_amd64.crcbundle exists
INFO Getting bundle for the CRC executable
INFO Downloading bundle: C:\Users\linuxnasa\.crc\cache\crc_hyperv_4.13.6_amd64.crcbundle...
4.00 GiB / 4.00 GiB [------------------------------------------------------------------------------] 100.00% 3.00 MiB/s
INFO Uncompressing C:\Users\linuxnasa\.crc\cache\crc_hyperv_4.13.6_amd64.crcbundle
crc.vhdx: 16.99 GiB / 16.99 GiB [----------------------------------------------------------------------------] 100.00%
oc.exe: 114.16 MiB / 114.16 MiB [----------------------------------------------------------------------------] 100.00%
INFO Checking if the daemon task is installed
INFO Installing the daemon task
INFO Checking if the daemon task is running
INFO Running the daemon task
INFO Checking admin helper service is running
Your system is correctly setup for using CRC. Use 'crc start' to start the instance
Step-4: Start the setup
In this step, execute the command, crc start to start the OpenShift setup as shown below. This will start the cluster and provide the GUI url along with credentials. It will also ask for the pull secret in order to pull the artifacts from red hat . Provide the secret from pull secret text file which was downloaded in step 1.
C:\Users\linuxnasa>crc start
INFO Checking minimum RAM requirements
INFO Checking if running in a shell with administrator rights
INFO Checking Windows release
INFO Checking Windows edition
INFO Checking if Hyper-V is installed and operational
INFO Checking if Hyper-V service is enabled
INFO Checking if crc-users group exists
INFO Checking if current user is in crc-users and Hyper-V admins group
INFO Checking if vsock is correctly configured
INFO Checking if the daemon task is installed
INFO Checking if the daemon task is running
INFO Checking admin helper service is running
INFO Loading bundle: crc_hyperv_4.13.6_amd64...
INFO Starting CRC VM for openshift 4.13.6...
INFO CRC instance is running with IP 127.0.0.1
INFO CRC VM is running
INFO Updating authorized keys...
INFO Check internal and public DNS query...
INFO Check DNS query from host...
INFO Verifying validity of the kubelet certificates...
INFO Starting kubelet service
INFO Waiting for kube-apiserver availability... [takes around 2min]
INFO Adding user's pull secret to the cluster...
INFO Updating SSH key to machine config resource...
INFO Waiting until the user's pull secret is written to the instance disk...
INFO Changing the password for the kubeadmin user
INFO Updating cluster ID...
INFO Updating root CA cert to admin-kubeconfig-client-ca configmap...
INFO Starting openshift instance... [waiting for the cluster to stabilize]
INFO 5 operators are progressing: image-registry, kube-storage-version-migrator, network, openshift-controller-manager, service-ca
INFO All operators are available. Ensuring stability...
INFO Operators are stable (2/3)...
INFO Operators are stable (3/3)...
INFO Adding crc-admin and crc-developer contexts to kubeconfig...
Started the OpenShift cluster.

The server is accessible via web console at:
https://console-openshift-console.apps-crc.testing

Log in as administrator:
Username: kubeadmin
Password: SkL9h-U9D2c-tJgvr-q2D4c

Log in as user:
Username: developer
Password: developer

Use the 'oc' command line interface:
> @FOR /f "tokens=*" %i IN ('crc oc-env') DO @call %i
> oc login -u developer https://api.crc.testing:6443
Step-5: Add crc path in system PATH variable
In this step, execute the command crc oc-env. This will show the path of crc which needs to be added in the system PATH variable in order to use OpenShift CLI commands (oc).
C:\Users\linuxnasa>crc oc-env
SET PATH=C:\Users\linuxnasa\.crc\bin\oc;%PATH%
REM Run this command to configure your shell:
REM @FOR /f "tokens=*" %i IN ('crc oc-env') DO @call %i

C:\Users\linuxnasa>SET PATH=C:\Users\linuxnasa\.crc\bin\oc;%PATH%
Step-6: Verify the OpenShift Local installation
In this step, check if the current config context is set to crc developer or admin using below command.
C:\Users\linuxnasa>oc config get-contexts
CURRENT NAME     CLUSTER             AUTHINFO   NAMESPACE
crc-admin      api-crc-testing:6443  kubeadmin  default
crc-developer  api-crc-testing:6443  developer  default
*minikube      minikube              minikube   default
Next, set the context to crc-developer as shown below.
C:\Users\linuxnasa>oc config set-context crc-developer
Context "crc-developer" modified.
Next, login as developer as shown below
C:\Users\linuxnasa>oc login -u developer https://api.crc.testing:6443
Logged into "https://api.crc.testing:6443" as "developer" using existing credentials.
You don't have any projects. You can try to create a new project, by running
oc new-project <projectname>
Next, create a new project and check if project is created.
C:\Users\linuxnasa>oc new-project test-oc
Now using project "test-oc" on server "https://api.crc.testing:6443".
You can add applications to this project with the 'new-app' command. For example, try:
oc new-app rails-postgresql-example
to build a new example application in Ruby. Or use kubectl to deploy a simple Kubernetes application:
kubectl create deployment hello-node --image=registry.k8s.io/e2e-test-images/agnhost:2.43 -- /agnhost serve-hostname

C:\Users\linuxnasa>oc projects
You have one project on this server: "test-oc".
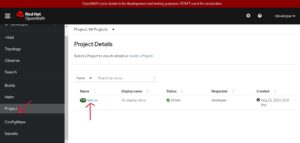
Lastly, you can open the crc GUI in a browser, login as developer and check that the newly created project is reflected under Project option as shown below.
Using project “test-oc” on server “https://api.crc.testing:6443”.
Summary
We saw how we can easily install and configure Red hat OpenShift local in Window’s system. In similar way, installation can be done on Linux OS and MacOS. You can also follow the guide here for any common installation error or for installing on any OS With this single node cluster up, one can easily start learning and practicing the basic OpenShift operations.