In this tutorial, we will learn about how to create security group in AWS using 7 steps. Ideally when you create a VPC, a default security group is created. Whenever you create any resource in this VPC say an EC2 instance or web server or load balancer, this default security group will be applied to the resource until you explicitly remove or add any other security group to it.
What is Security group
Security group is a traffic controller for a resource where it is attached to in a VPC. It act as a firewall to the resources in a VPC that protects the traffic coming in and going out to a resource. It is a collection of rules which are responsible for handling the traffic that reaches in and going out from the resource where Security group is attached. Security groups are stateful which means, response for any rule will reach the instance regardless of applied Security group rules. There are two types of rule that can be applied in Security group.
- Inbound rule: responsible for managing traffics coming in the resource- in a VPC
- Outbound rule: responsible for managing the traffics going out from the resource in a VPC.
Each rule in a security group defines port range, protocol, source and destination which we will discuss later in this tutorial. Resources can have one or more security groups attached to it. There are two types of Security group in AWS
- Default Security group: created by default by AWS in a VPC
- Custom Security group: created by users in a VPC
How Security group Works?
When we create a Security group in a VPC, we attach it to a resource. Let’s say we have creates a Securiy group and attached it to an EC2 instance. What basically happens is that this Security group is applied to all the network interfaces that are attached to the EC2 instance. There is quotas defined in AWS for creating the number of Security groups in a VPC. You can find more about quotas here.
![How to Create Security group in AWS [7 Steps ]](https://www.linuxnasa.com/wp-content/uploads/2023/04/security-group-aws.jpg)
How to Create Security group in AWS [7 Steps ]
Security group can be created by following below given steps. Before you start following up the steps below, make sure prerequisites are met. We will need VPC detail while creating the Security group and EC2 instances while testing the Security group.
Prerequisites
- An existing VPC. If you do not have existing VPC, Create one by following the link here.
- An existing EC2 instance. If you do not have existing EC2 instance. Create one by following the link How to Create EC2 Instance Using 10 Easy Steps
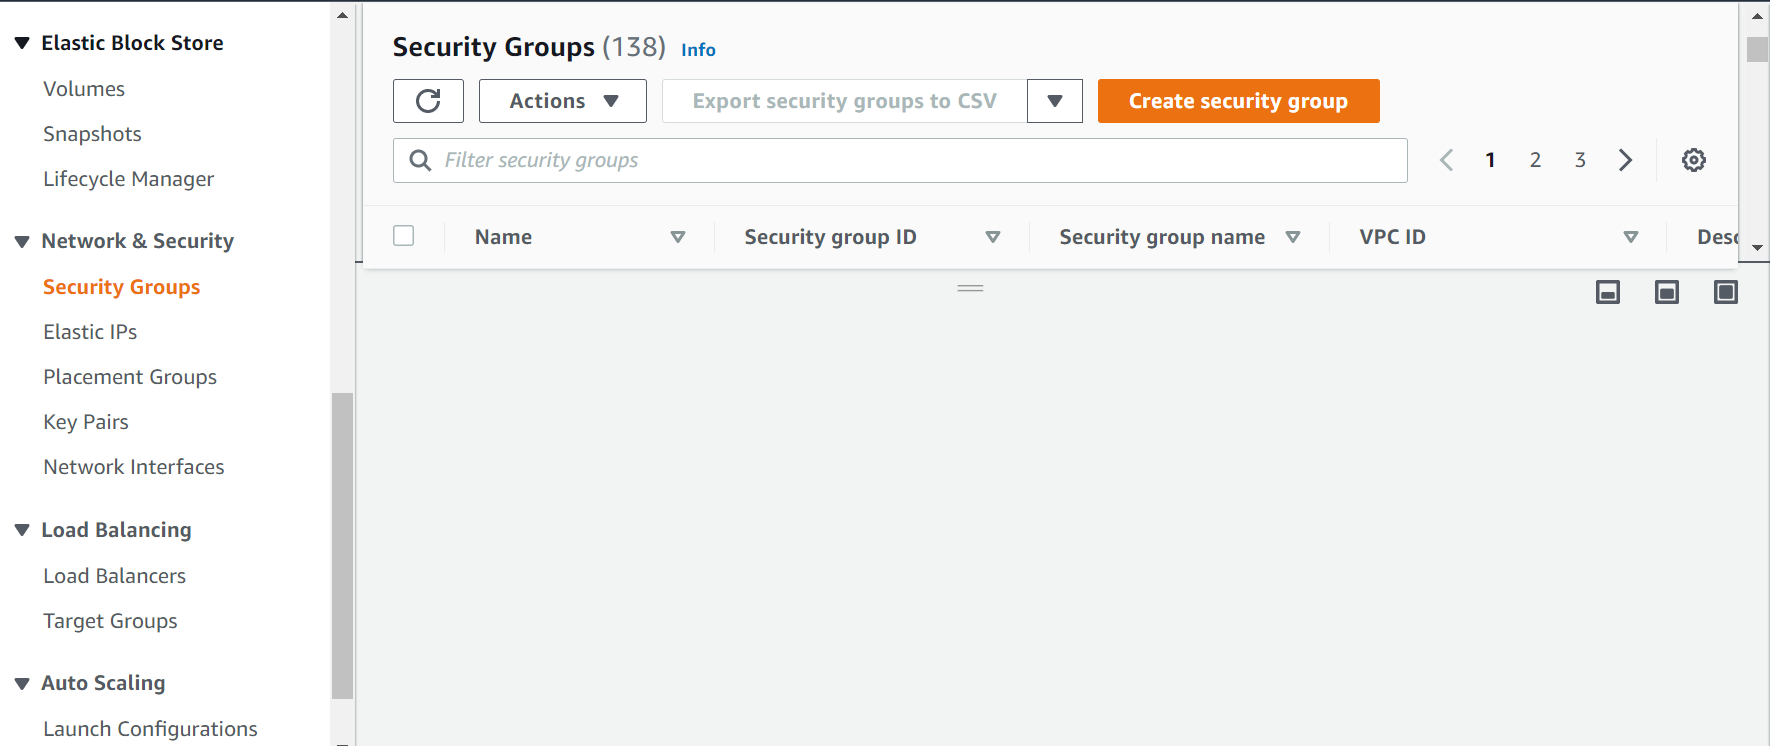
Step-1: Search EC2 Service
In this step, go to EC2 console and click on Security Groups from left panel as shown below. Next, click on Create security group.
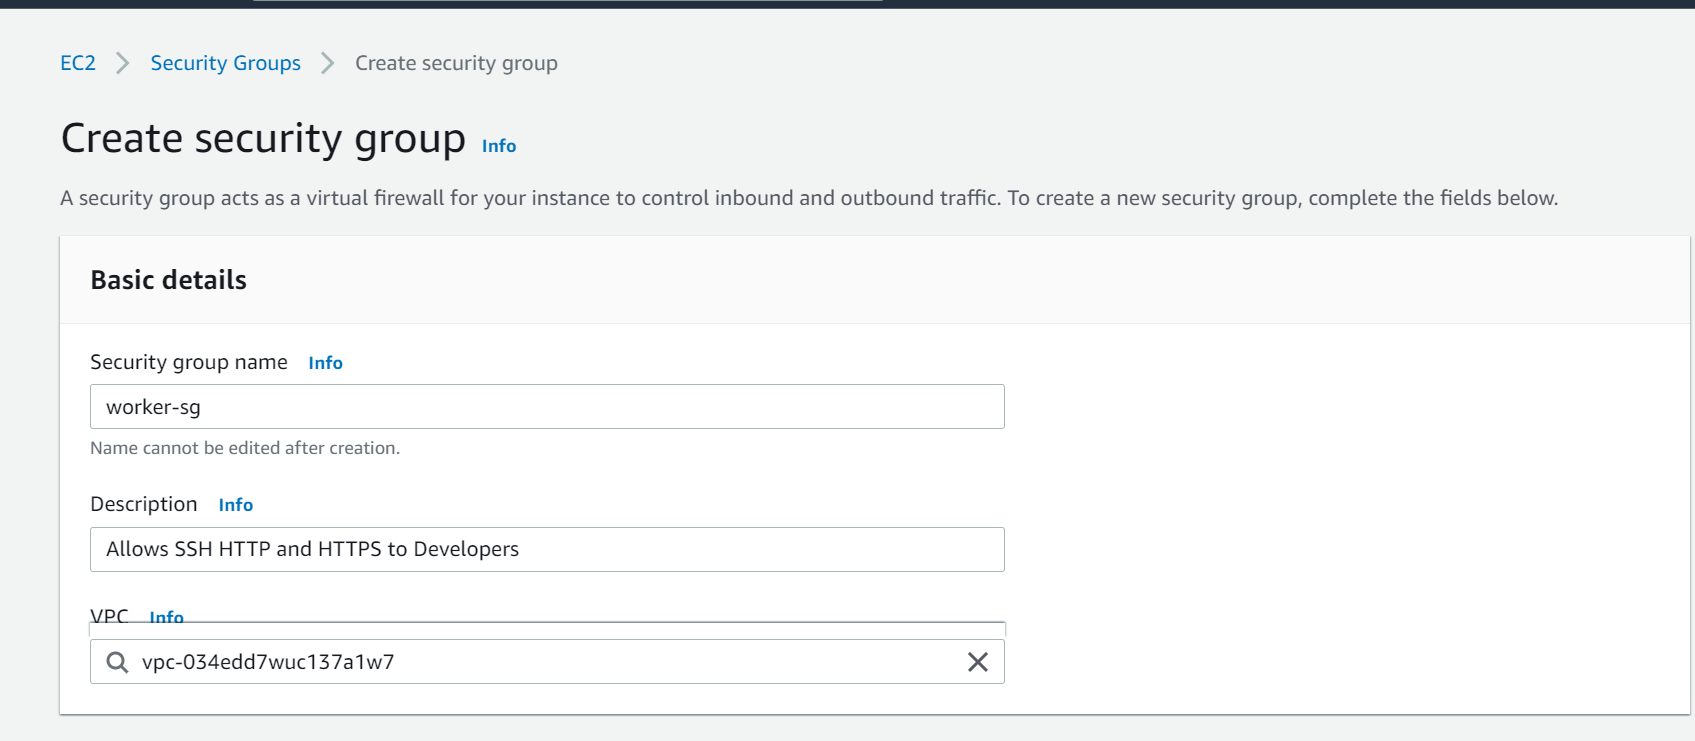
Step-2: Provide Configuration Details
In this step, give a unique name to the security group and select your VPC from the drop down as shown below. I have given the name worker-sg. Also, add a short Description about what this Security group will do.
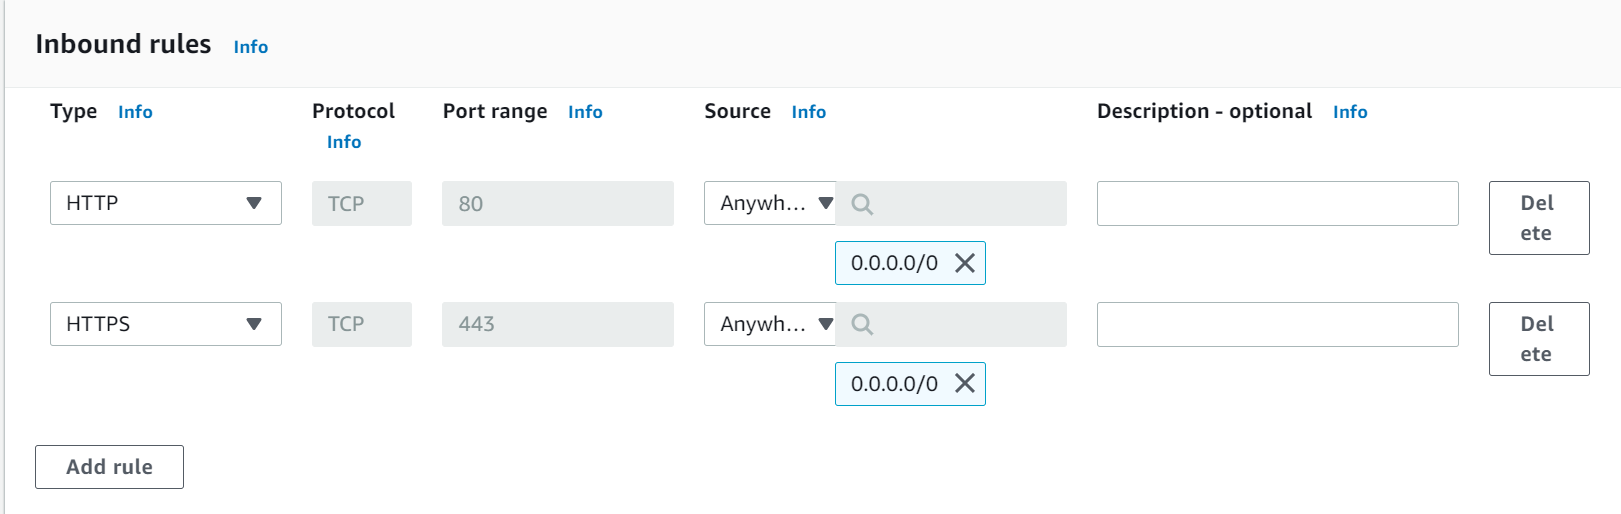
Step-3: Add Inbound rules
In this step, add the inbound rules. First, select the Type (protocol) from the drop down then select the source from where inbound traffic will be allowed.
I have added two inbound rules HTTP (port 80) and HTTPS (port 443) and I have selected the source Anywhere which means any external traffic can access the resource on port 80 and 443.
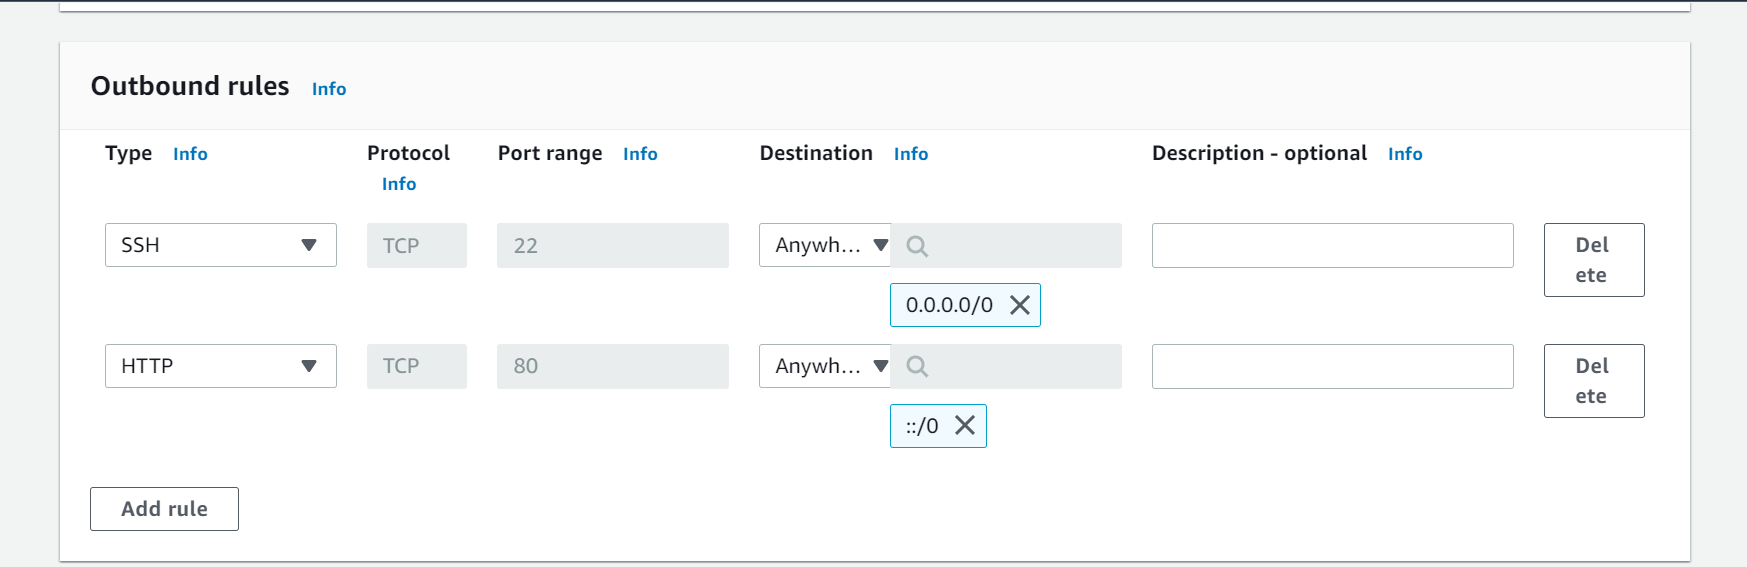
Step-4: Add Outbound rules
In this step, add Outbound rules. I have added two outbound rules, SSH (port 22) and HTTP (port 80) which means resource can send the external traffic only on port 22 and port 80. I have selected the destination Anywhere which means resource can send the traffic to anywhere in external world. Next, click on Create security group.
Step-5: Verify Security Group
In this step, once security group is created without any error, a pop up will appear as shown below.

Step-6: Attach Security group To EC2 Instance
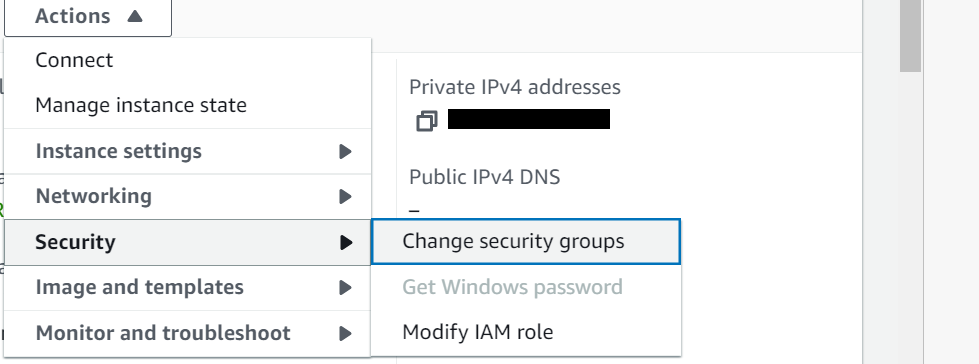
In this step, add the new Security group created in previous step to the instance. I have applied to my EC2 instance named EC-instance1. To do this, click on your instance then click on Actions -> Security -> Change security groups as shown below.
Next, there are two ways to apply additional security groups to an instance.
- Delete the existing Security group(s) and apply the new one.
- Add the new Security group on top of existing one.
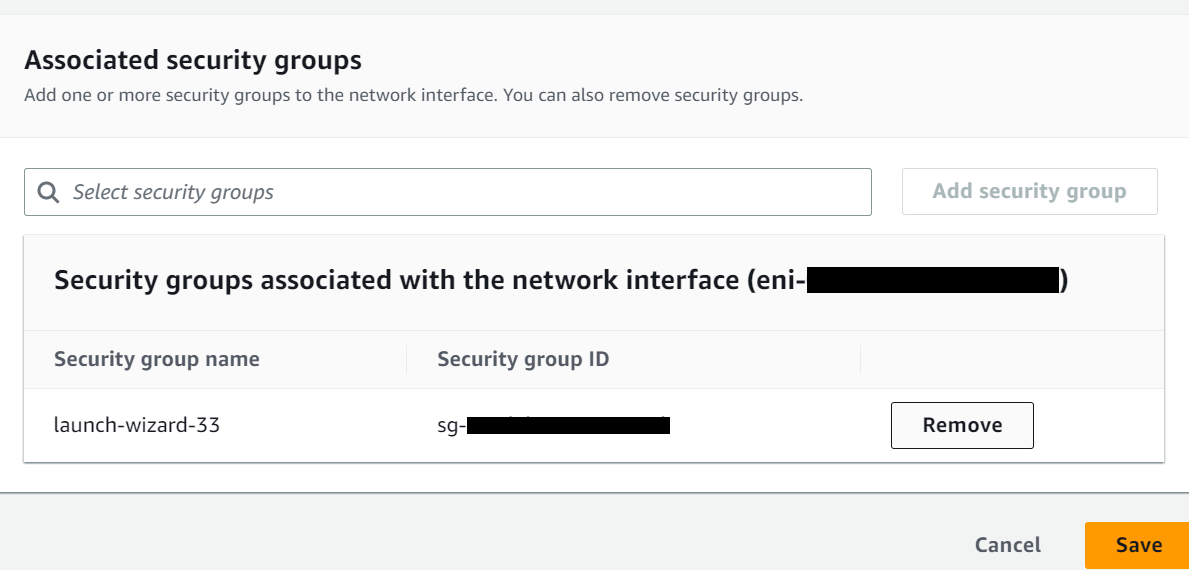
I will delete the existing Security group and add the newly created one for this demo. Click on Remove button to delete the existing security group launch-wizard-33 applied to the instance as shown below.
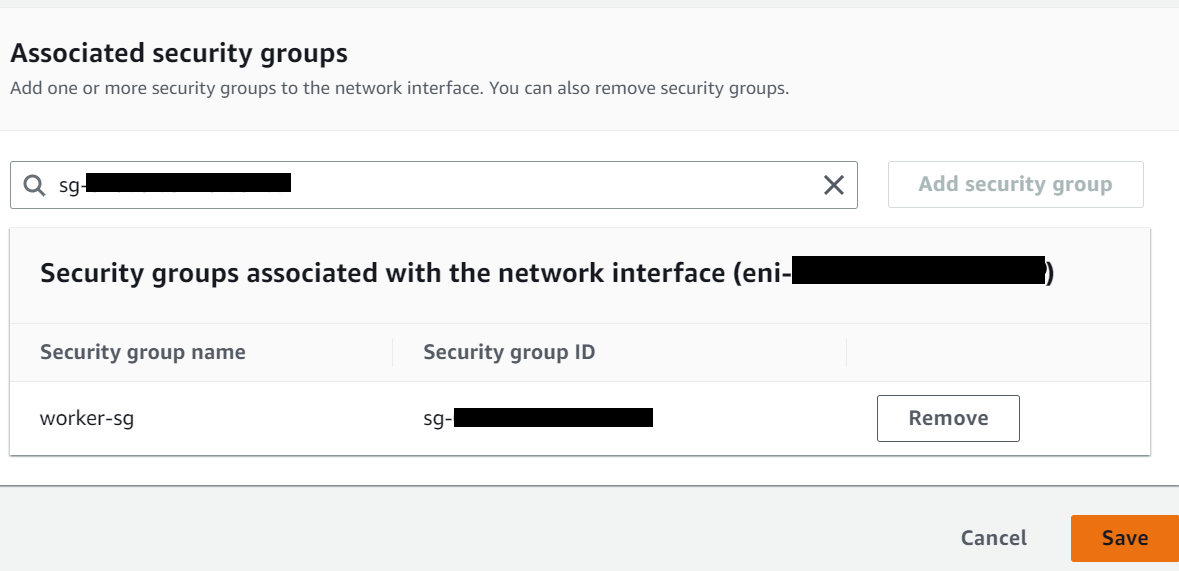
Next, search the new Security group (worker-sg) and click on Add security group button. Next, click on Save button to attach the group to instance as shown below.
Step-7: Test the Security Group
In this step, we will test the working of Security group applied to the EC2-instance1.
I have two EC2 instances in the same VPC namely EC2-instance1 and EC2-instance2. Connect to EC2-instance2 and execute below command to test the inbound rule added in step 3.
[linuxnasa@ec2-instance2 ~]$ ssh linuxnasa@ec2-instance1
ssh: connect to host ec2-instance1 port 22: Connection timed out
As you see, SSH to EC2-instance1 fails from EC2-instance2. This is because we have not added the inbound rule to allow the SSH from anywhere in EC2-instance1.
Conclusion
In this tutorial, we learnt about how to create security group in AWS. When defining the rules in Security group, we can either select specific IP or the range of IPs as source or destination. We can protect the modification to Security groups by authorizing the users via IAM principals. You can explore more to understand how to restrict the Security group creation and access using IAM.